Sunday, December 4, 2011

The Crime Scene

Exhibit 1
A redheaded victim is pictured after she is found with a slit throat on the hood of a car.

Exhibit 2
An O- blood sample was found at the crime scene. Only Candi Stores and Ginger Snap have O- blood, narrowing the possible victims to these two women.

Exhibit 3
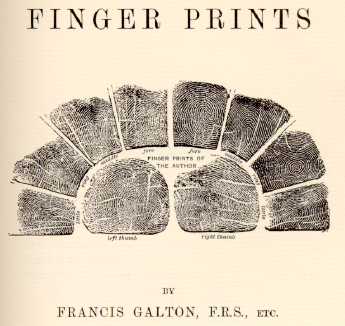
A tented arch fingerprint is lifted at the crime scene, with the only possible match being Candi Stores. Therefore, Candi Stores is the killer.

Exhibit 4
Dark red lipstick found on plastic cup would most likely indicate a female victim. The lip print left shows a full bottom lip with a partial upper lip.

Exhibit 5
The cup contained a blue liquid drunk by the victim, as proved by the lipstick print. After poison and drug analysis, no harmful substances were found in the drink. The pH of the liquid was 8, slightly basic but not harmful enough to kill.

Exhibit 6
An unknown fiber found at the crime scene proved to be cotton underneath the microscope. Compared to a known cotton sample, the substance had the same distinct unruly pattern of colorless strands.

Exhibit 7
Handwriting found at the bar reads "Please help me!" The paper was obviously written by the victim. The handwriting can easily be matched to Ginger Snap's distinct letter formation. For instance, Ginger Snap's writing has a forward slant, narrow loops, small spacing, a ratio between width and height of letters of about 1, all cursive writing, and few pen lifts. The sample at the bar matches each of these characteristics exactly.

Exhibit 7A
Letter found at the scene reads "I needed the money."The letter was written by the perpetrator, who is at this point believed to be Candi Stores. The writing sample given by Candi Stores contains a forward slant, small attributes on the "e's," incomplete letters (d and o), rather large writing, and embellishments on the "t." The unidentified handwriting matches Candi Store's perfectly.

Exhibit 8
The unknown black fiber found at the scene can be identified as wool through microscopic examination. Once compared to a known wool sample, the length of the fibers, the color, and the general composition of the hair prove to be the same.

Exhibit 9
Gold necklace found at the crime scene was of no importance to the investigation. My group theorized that it could have been the murder weapon, but no blood was found on the item.

Exhibit 10
The fingerprint found at the crime scene is a double loop that matched only Ginger Snap's print.

Exhibit 11
A fingerprint sample had to be lifted off a piece of glass with tape and dark powder. The print was identified as an ulnar loop, which matched no profile and therefore had no relevance.

And the killer is....
Ginger Snap, a server at the local bar, was being preyed on by a desperate entertainer named Candi Stores. Ginger Snap knew she was in trouble, as indicated by her handwritten note that read "Please help me!" that was most likely slipped to a customer with their order. Once outside the bar at the end of her shift, Ginger Snap was confronted by Candi Stores, who intended to either mug Snap and run or kill her acting as a hitman. Either way, a struggle ensued (proven by the presence of two sets of fibers) and Stores managed to slit Snap's throat. The murder weapon could have been the gold necklace, tied around Ginger Snap's throat until the necklace broke skin. Or it could have been a knife or some object not present at the crime scene, which would mean that the weapon was dumped or still in Candi Store's possession.

All photos of crime scene courtesy of Ashley Eakins and Audrey Brown

Sunday, November 20, 2011

Labs

Fingerprinting
In this portion of our forensics project, we placed our fingers on a light surface and allowed the grease to from a print. We then gingerly brushed a dark powder on the print so as not to disturb the print's shape and to make it more visible to the naked eye. A piece of tape must be placed over the powder to lift the fingerprint as if at a crime scene. Lastly, the piece of tape with the newly lifted fingerprint has to be applied to a light colored piece of paper in order for further examination and analysis.

In this fingerprinting section of our forensics lab, we were each required to stamp our fingerprints in blue ink and place our prints in the corresponding box. We then identified the types of loops, arches, or whorls present in each fingerprint based on a given picture of each.

Hair/Fiber Analysis
For this lab, our groups had to analyze various samples of hairs and fibers through a microscope and identify unique traits of each. Pictured above, some of the analyzed samples were African-American hair, synthetic hair, dyed hair, nylon fabric, and cotton. Identifying traits include the color of the hair or fiber, the condition of the tip, and any oddities that make the sample easily identifiable.

Lipstick Analysis
For the lipstick analysis, we each had to apply lipstick and place a lip print on a notecard. Easily discernible features of an individual's lip include space between the lips, any scars on the lip, humps/arches, ratio of the size of the top lip to the bottom lip, chapped lips, and the general shape of the lip. As seen above in my lipstick print, I have distinct humps on my upper lip, a small space between by lips, lines running through my bottom lip, and a full bottom lip that is a lot bigger than my top. At a crime scene a lipstick print may be left behind for forensic examiners to analyze. However, the analysis of a lip print won't actually positively identify a single suspect like a fingerprint might.

Handwriting Analysis
Pictured above is one of the exercises we completed to demonstrate forensic handwriting analysis. In the first box is my writing with observations made by a forger. In the second box is a freehand forgery in both print and cursive. As clearly demonstrated, the letters in the forgery appeared very close to the original. However, the line habits are completely off as they slant steeply downward in the forgery. In addition, the ratio of the characters is a lot larger than the original, as are the spaces between the letters. In the third box is a traced forgery, which is understandably a lot more accurate than the freehand. Still, the traced forgery can be identified by the pen pressure. The forger seemed to have pushed down too hard on their pencil in an effort to replicate the original. Also, the line quality is shaky in areas where the forger tried to retrace certain letters, like the "f" in fox. In my opinion, tracing a forgery is a lot easier than freehanding. This is because in freehanding, the forger has to carefully replicate every aspect of the original writing while maintaining a steady speed to avoid shaky letters. In contrast, tracing only requires the forger to be focused on pen pressure, line quality, and simply following the shapes of the letters.

We were also required to write a fake check and tear it into pieces. People in other groups were then supposed to piece the checks back together and compare them to a stack of handwriting samples. We were all successful in my group in determining the writer of the check. The most identifying aspect of the writing was the ratio of characters, the line quality, and the distinctive shape of certain letters in both samples.

Footprint Analysis
For footprint analysis, each person in my group placed their foot in a bin of dirt to analyze details of the bottom of their shoe. The analysis of a footprint can reveal the relative weight of the person, the kind of shoe (revealed by certain patterns), and can positively identify a suspect if the print is very unique and similar to the suspect's shoe. The rarity of the designs on the bottom of the shoe can help solve a case by identifying a single suspect. In this exercise, we analyzed the weather conditions, the substance the print was left in, and important aspects of the footprint (size, writing, designs).

Drug Analysis

Drug
pH
Cocaine Reagent
LSD Reagent
Methamphetamine Reagent
1
5
+
-
-
2
9
+
-
-
3
2
-
+
-
4
8
+
-
-
5
6
+
-
-
6
3
-
+
-


The table above is the information for the drug analysis lab completed in class. We were given six unidentified substances, which were to be tested with various chemicals (cocaine reagent, LSD reagent, and meth reagent). If the substance turned blue in cocaine reagent, cocaine was present. If the substance turned yellow in LSD reagent, LSD was present. We also tested the pH of each liquid. The chart above shows the pH values and which drug was present in which compound. 


Poison
Sample
Metal Poison
1
Pb
2
Fe
3
none


Sample
Sugar
1
No sugar present
2
No sugar present
3
No sugar present

  
Sample
Odor
pH
Color after PHTH
1
Like cleaning products
11
pink (contains ammonia)
2
odorless
8
colorless
3
odorless
7
colorless


Sample
pH
Color after BTB
1
2
yellow (contains aspirin)
2
8
blue
3
7.5
blue


Sample
Color after Fe+3
1
colorless
2
blood red (cyanide present)
3
colorless


Sample
Color after Starch
1
yellow
2
pink
3
blue (iodine present)

The poison analysis lab was much like the drug analysis lab in that we had to test sets of unknown substances with chemicals to identify harmful poisons that could be contained within the sample. For example, in one of the tests, we had three unknowns that we had to test for ammonia by adding PHTH. We found that samples 2 and 3 remained colorless while sample 1 turned pink, positive for ammonia. These simple chemical tests could help identify the cause of death during an investigation and might even lead to a suspect.


Facial Recognition/Witness Experiment
The witness project was a unique experiment in which we didn't focus on facts or analytical examination but rather human relation and memory. In a group of six, we each cut out similar faces in several different magazines (faces must have same color and same size, otherwise the experiment will be invalid). After the faces were cut out, we cut individual facial features out, like the eyes, nose, mouth, and ears. The whole group placed their pieces in piles according to facial features. We then each drew from the pile pieces that would make a face, not necessarily the same face we had before. The faces were passed amongst ourselves, with ten seconds to memorize everything we could about the other person's constructed face. The faces were disassembled, placed in piles like before, and drawn back out to try to reassemble the memorized face. My results in the test are shown above, and my whole group's results were 100% accurate.

Tuesday, November 15, 2011

History of Fingerprinting

Fingerprints are the patterns on the tips of every finger. No two people have the same exact fingerprint, with the odds of this occuring being 1 in 64 billion.


The earliest recorded use of fingerprints dates back thousands of years as a mediocre identification system for the Babylonians and a method for recording business transactions for the Chinese. Only until the 19th century was the science applied to identify criminals.


In 1882, Sir Francis Galton, who studied human characteristics, compiled a database of 8,000 fingerprints for his research into a new system for identification. He published a book called Fingerprints, which became the world's first system for analyzing fingerprints, based on simple patterns in fingerprints that are easily identifiable and unique to every person.


In 1901, Scotland Yard, quickly followed by other law enforcement agencies around the world, established a Fingerprint Bureau solely for the purpose of identifying criminals by their fingerprints. This event marked the beginning of the use of fingerprints as the perfect unrefutable and unbiased method to pursue and apprehend criminals.

Before the 1980s, and before Japanese agencies developed an automatic system for fingerprint analysis called AFIS (Automated Fingerprint Identification System), cross-referencing prints lifted at the crime scene with the fingerprints of individuals containing a police record would have to be done manually. This process would take days or more at a time, even with a large workforce, to find a perfect match and a suspect. Understandably, the manpower this method required and the time with which it was done became extremely inconvenient and actually hindered law enforcement agencies. Still, even with their own development of an AFIS system, U.S. law enforcement was still hindered by the lack of coordination between agencies. Local authorities didn't share the same database as state authorities, who still didn't communicate with federal datab ases. Therefore, the AFIS system could only work within a small jurisdiction. That all changed, however, when the IAFIS (Integrated Automated Fingerprint Identification System), was established. This new database allowed the sharing of information between all levels of authorities, making the system faster and more accurate than ever. IAFIS is still in use today, with a databasae containing over 47 million fingerprints.

Types of Fingerprints

There are three basic types of fingerprints that can be used in forensics: direct, latent, and plastic.

Direct
Direct prints are clearly visible to the naked eye. In order for these to occur, the print must be pressed into a substance which would make it visible. These can include blood, dirt, ink, or similar materials. The fingerprint must come in contact with one of the materials and then a surface to leave a direct print.


Latent
Latent prints are formed when the sweat or grease from the finger leaves a print on an object. These fingerprints aren't visible to the naked  eye and must be lifted via dusting or another process to be examined later.


Plastic
Plastic prints are formed when the finger presses into a soft surface to leave behind an impression. Some examples include wax, clay, and soap.

Monday, November 14, 2011

Lifting and Developing Prints

Depending on the surface from which a fingerprint is being lifted, two different procedures may be utilized. On a nonabsorbent or hard surface, examiners use a powder to lift prints. In contrast, on a soft or porous surface, certain chemicals may be used to collect fingerprint evidence.


    Nonabsorbent/Hard Surfaces (wood, tile, glass)


 The color of the powder used at a crime scene depends on the surface from which the print is being lifted. If the surface is of a light color, a black powder will be brushed over the print. If the surface is darker, a light powder will be used. The powder is brushed over the fingerprint carefully so as not to disturb any of the identifiable ridges. Tape is then applied over the print and then reapplied onto a sheet of paper to be analyzed in a lab.


Soft/Porous Surfaces (cloth)
Iodine Fuming- The material from which a print is to be extracted must be placed in an enclosed chamber with iodine crystals. The crystals are heated, forming a vapor which makes the print visible. However, the print will only be visible while the reaction is taking place, so a picture must be taken for examination or the print must be preserved with sprayed 1% solution of starch in water.


Silver nitrate- A powder form of silver nitrate (AgNO3) must be brushed on the print and exposed to ultraviolet light to make the latent print visible with a very distinguishable color.

Basic Patterns of Fingerprints

Arches
In an arch, the ridges on the fingerprint run straight across the print without redoubling back the way a loop or whorl does. There are two types of arches:

Tented Arch
The arch is very distinctive and thrusts upward
with lines underneath arch appearing curved
Plain Arch
A slight arch appears in the middle of the pattern
with underlying lines remaining consistently straight


Loops
Loops are ridges which turn or loop back, but don't completely twist in a full circle. Loops are classified by the direction which they flow toward, the radius or the ulna.


Radial Loop
This loop flows toward the radius, considering
that this is a right-handed print
Ulnar Loop
The loop shown above flows left in the direction
of a right-handed ulna


Whorls
In a whorl, the ridges on the print turn completely to make at least one full circuit. This means that at least one complete oval or circle shape will be easily visible.

Double Loop Whorl
Two separately distinct sets of loops which
individually make their own whorls

  
Plain Whorl
The simplest and most common whorl.
Plain whorls curve into only one full circular shape
                                                                                                         

Central Pocket Whorl
At least one ridge curves around to make
more than one full circuit
Accidental Whorl
This distinct set of ridges reveals a plain arch with two
additional types of patterns that make a full circuit